
Last updated September 2025
Overview
Discover the essentials of Bloomflow's Import feature to kickstart your journey in managing portfolio data efficiently. This guide introduces the core functionality, basic steps, and key concepts needed to perform imports seamlessly, whether you’re creating new items or updating existing ones.
Who Should Use This Tool
This guide is designed for administrators and stewards of portfolio-related data on Bloomflow. Typical users include:
- Platform Administrators: Manage data across the entire platform.
- Innovation Teams: Collaborate on updating project or partner information.
- Data Stewards: Maintain data quality and oversee bulk operations.
You’ll learn to:
****
- Navigate the Import interface
- Set up and customize templates
- Understand the overall flow of creating and updating items
1. Scope and Core Functionality
The Import feature in Bloomflow is a robust tool for managing portfolio data in bulk. From onboarding new data to updating existing items, it allows for efficient, large-scale operations while ensuring accuracy.
What can you do with Import?
While a lot is possible on Bloomflow’s application itself, sometimes managing your portfolios requires bulk actions. The Import feature allows you to:
- Create or Update Items: Add partners, projects along with workflow information in Bloomflow and keep portfolio information accurate and up-to-date.
- Link Related Items: Connect portfolio items for better organization and context.
Where does it fit?
The Import feature is ideal for:
- Onboarding historical data for new teams.
- Managing seasonal updates for events or initiatives.
- Maintaining data quality with validation and refinement tools.
What it is Not?
While powerful, the Import feature is:
- Not a Real-Time Sync Tool: It doesn’t automatically sync with external databases or systems.
- Not a Data Validation Guarantee: While it flags errors and warnings, the accuracy of uploaded data relies on user input.
- Not for Non-Portfolio Elements:
- While you can add existing tags, labels and sources to portfolio items during an import, you cannot create or configure new tags, labels or sources via import.
- Documents and users can’t be managed via Import.
2. Overall flow of the Import process
This section provides a high-level overview of how to add new items to your Bloomflow portfolios using the Import feature. For detailed, use-case-specific guidance, refer to the Import: Explore Use Cases documentation.
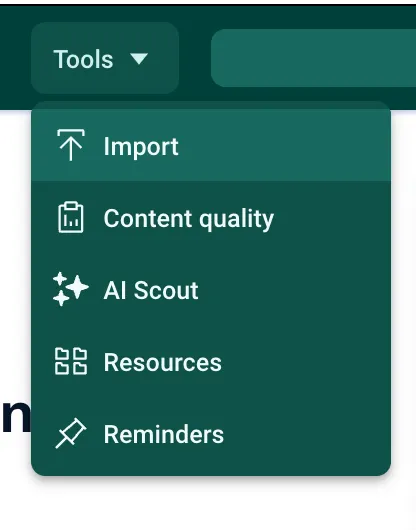
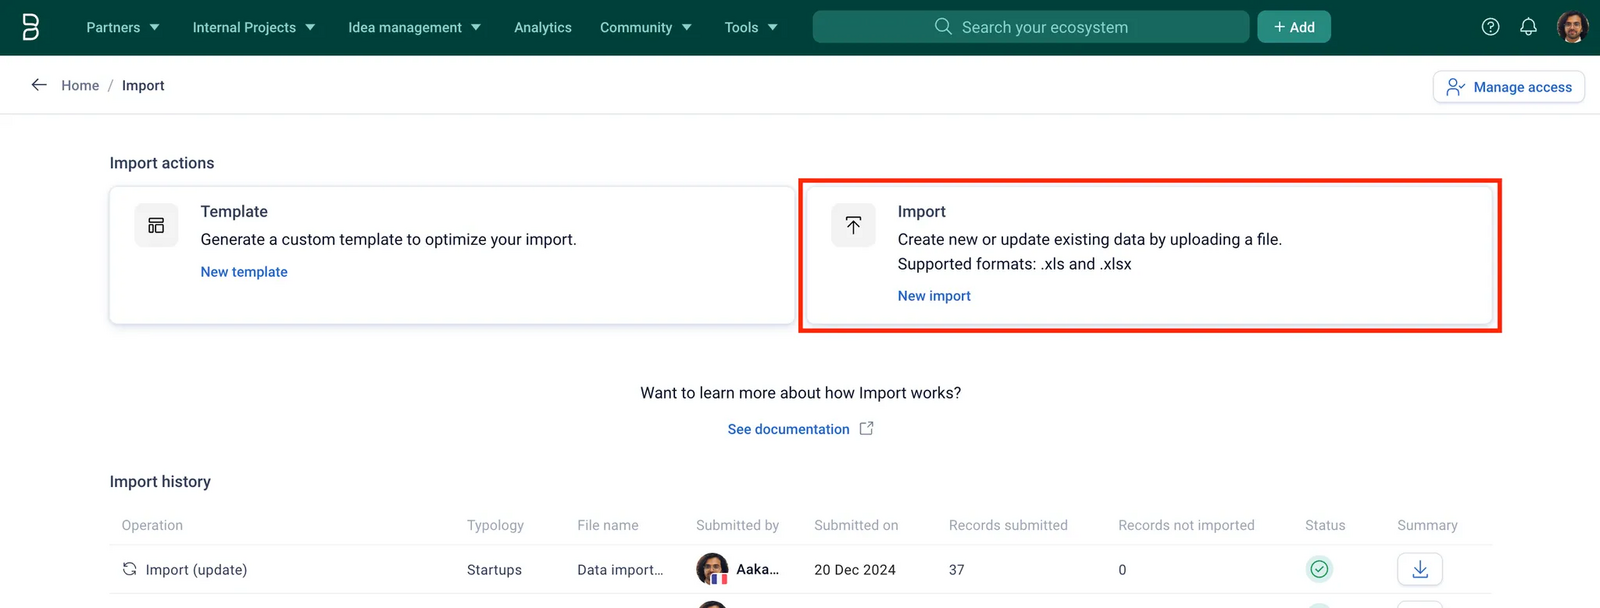
Once you have permissions to import for any typology, you will be able to access the Import center via Tools menu (Navbar) > Import. Learn more about managing import accesses in the Administrate Import Permissions ****section.
Skip Steps 1 and 2 if you prefer to use your own Excel file instead of the Bloomflow template. In that case, ensure that you appropriately map the columns from excel to Bloomflow fields (see Step 4).
- Prepare the Template:
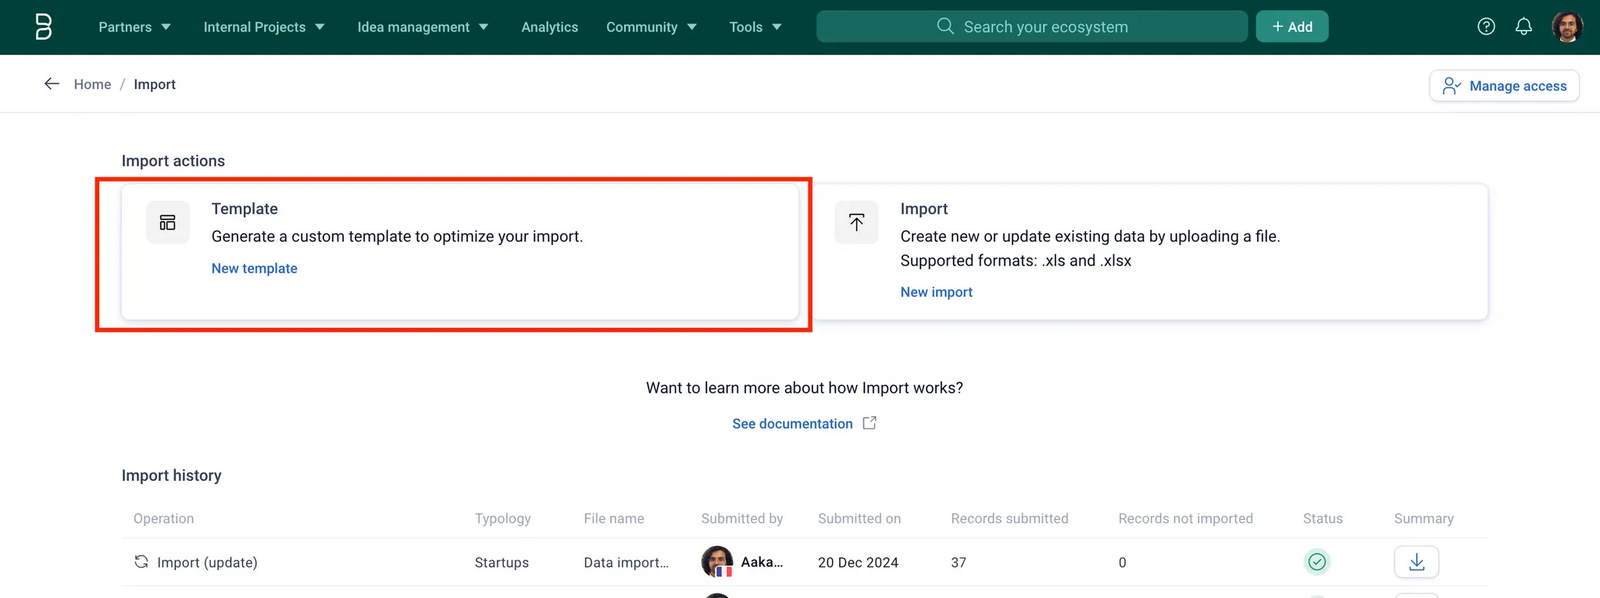
Navigate to Import center and customize a template for your selected typology (e.g., partners) from Bloomflow. Learn more about templates in **** Work with Templates section.
- Fill in data:
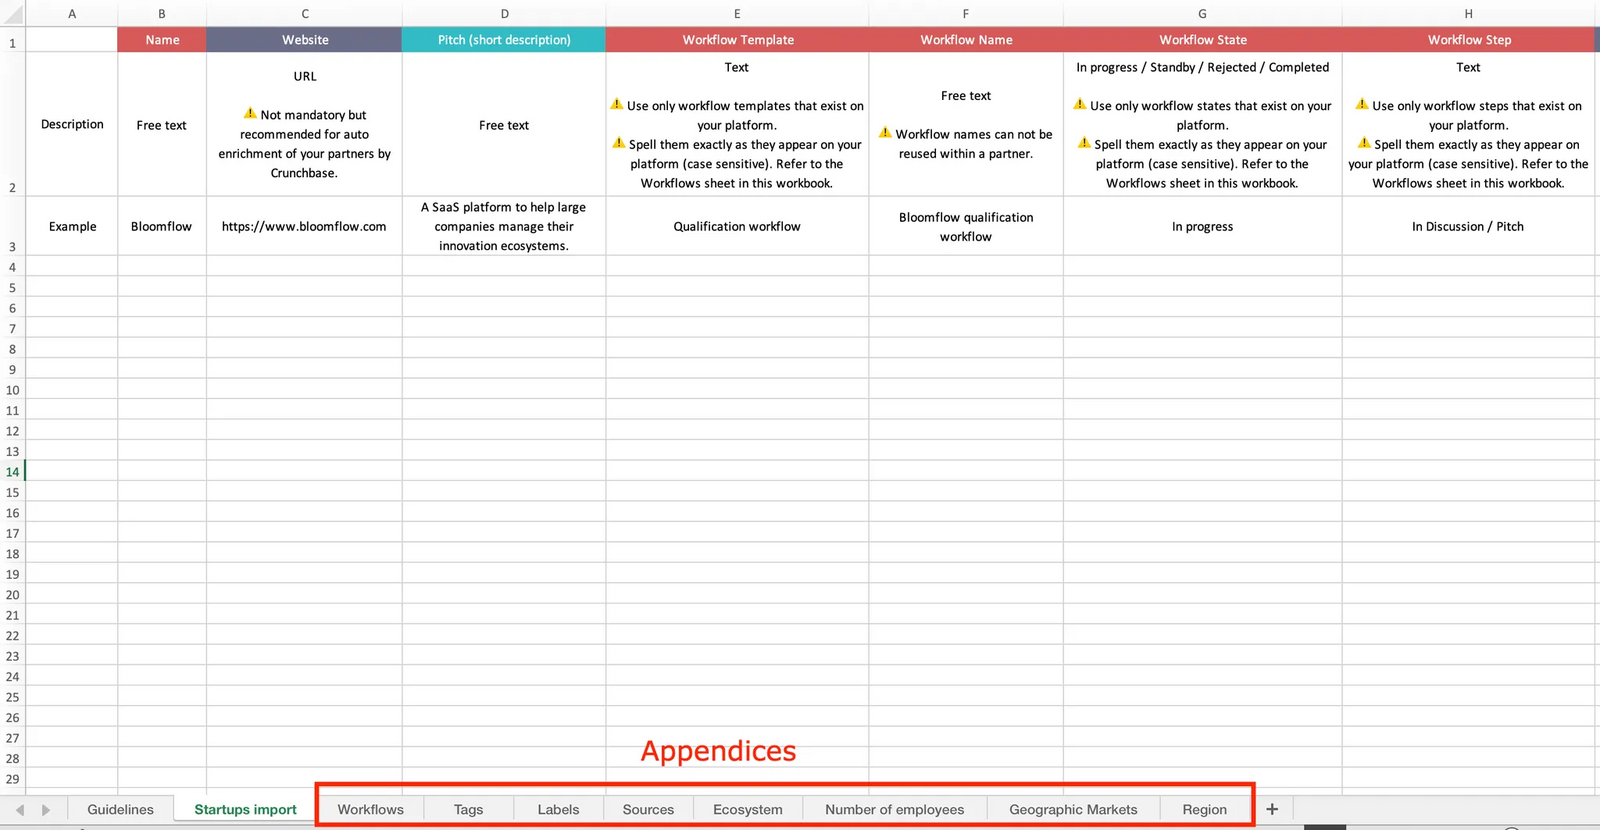
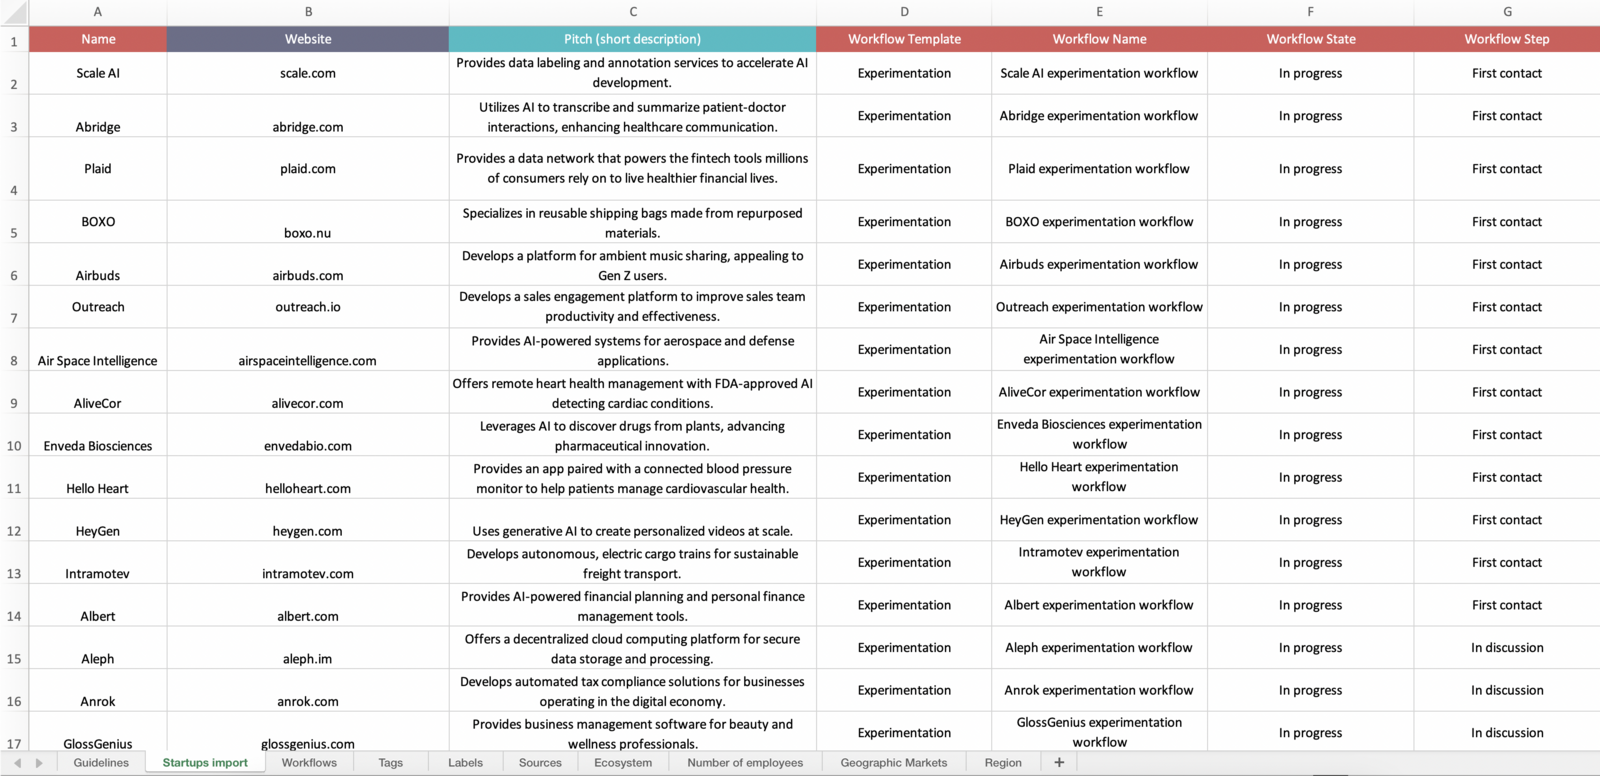
Once downloaded, add records with all required fields following the instructions and use the Appendices to find valid values for fields like Workflow States and Steps, Tags, Labels, etc.
- Initiate the import:
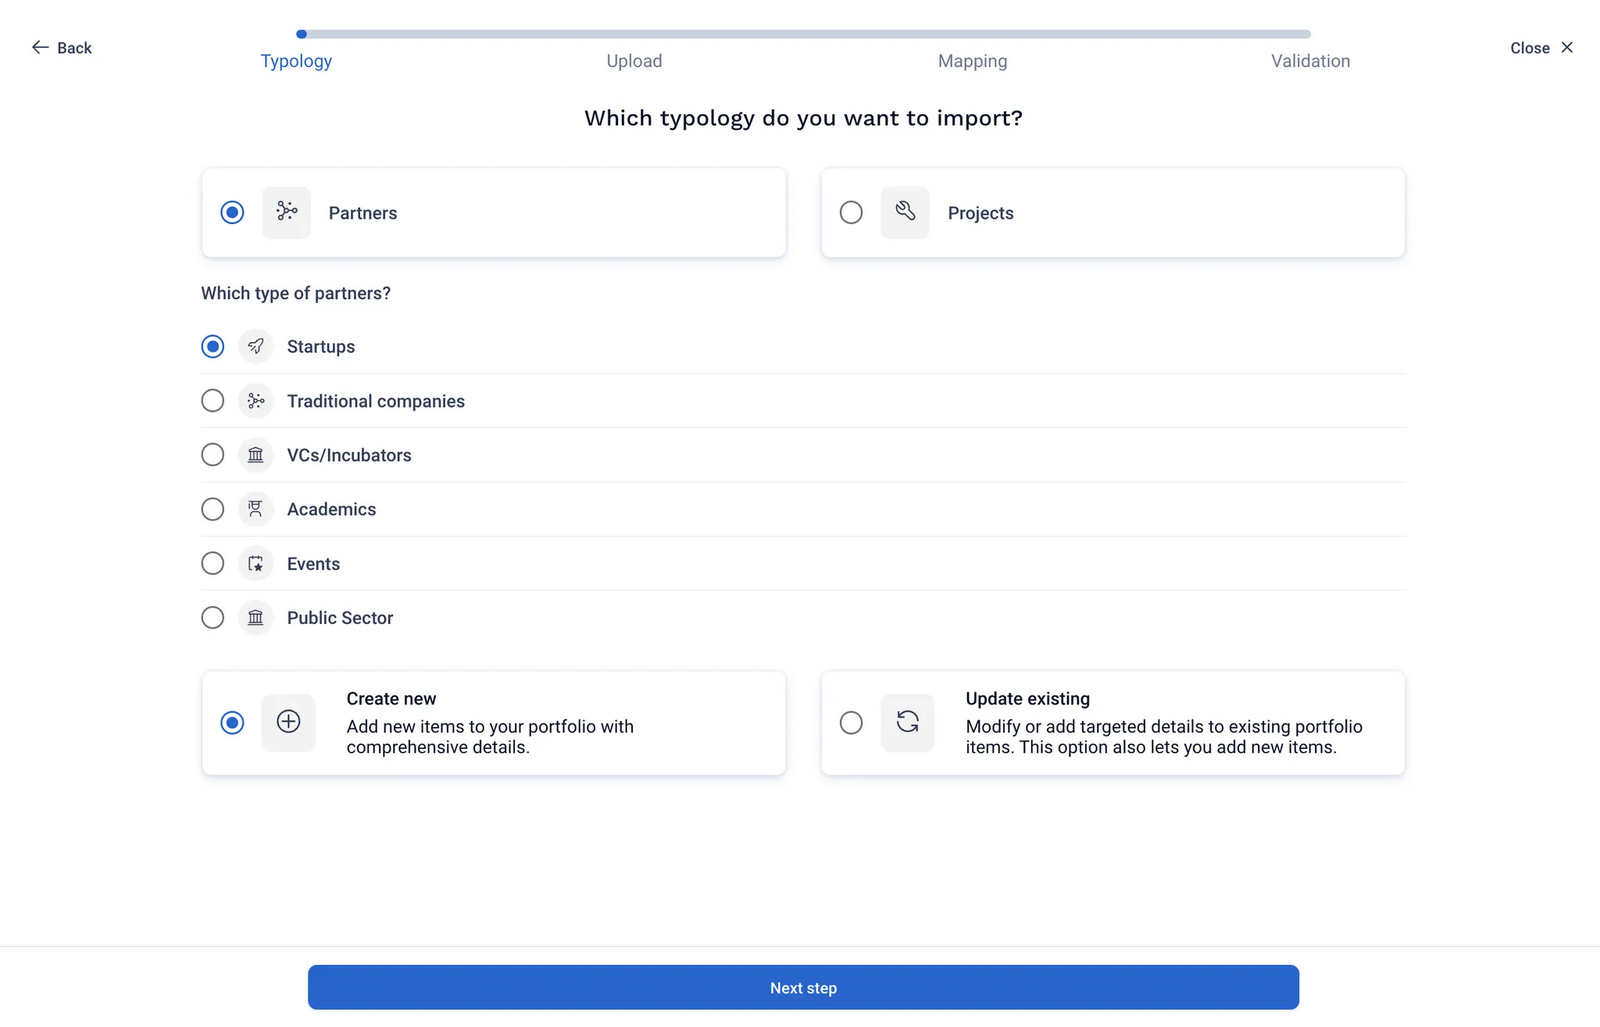
Navigate to Import Center and start a new import. Select the typology (e.g., Startups) and operation ( Create new or Update existing).
- Upload the file and map fields:
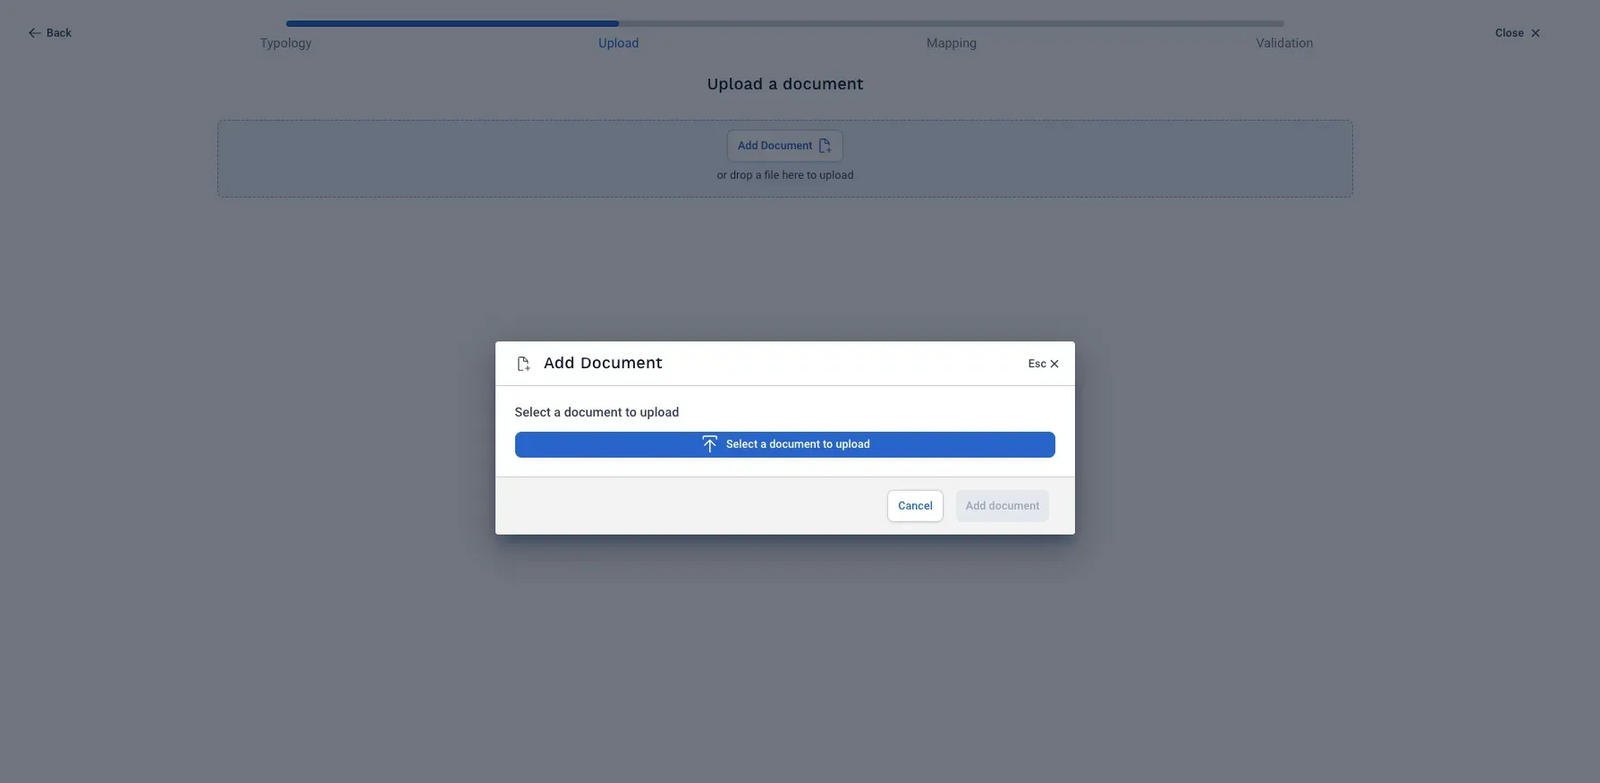
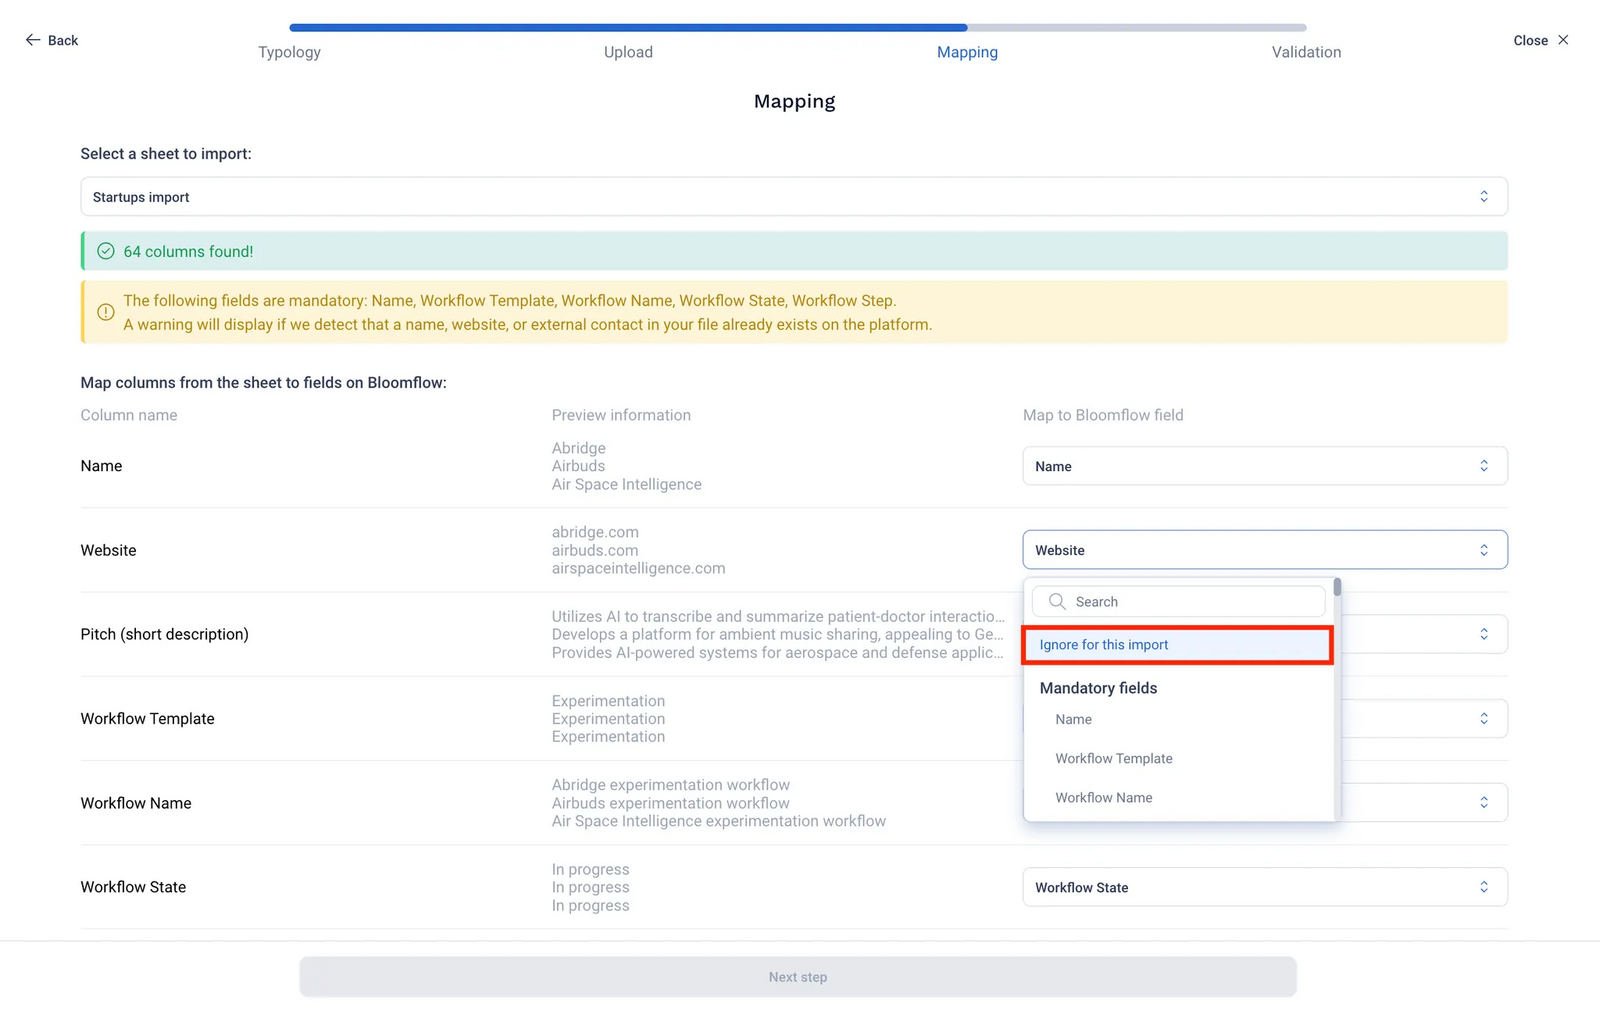
Upload your filled-in Excel file and select the appropriate sheet containing your data.
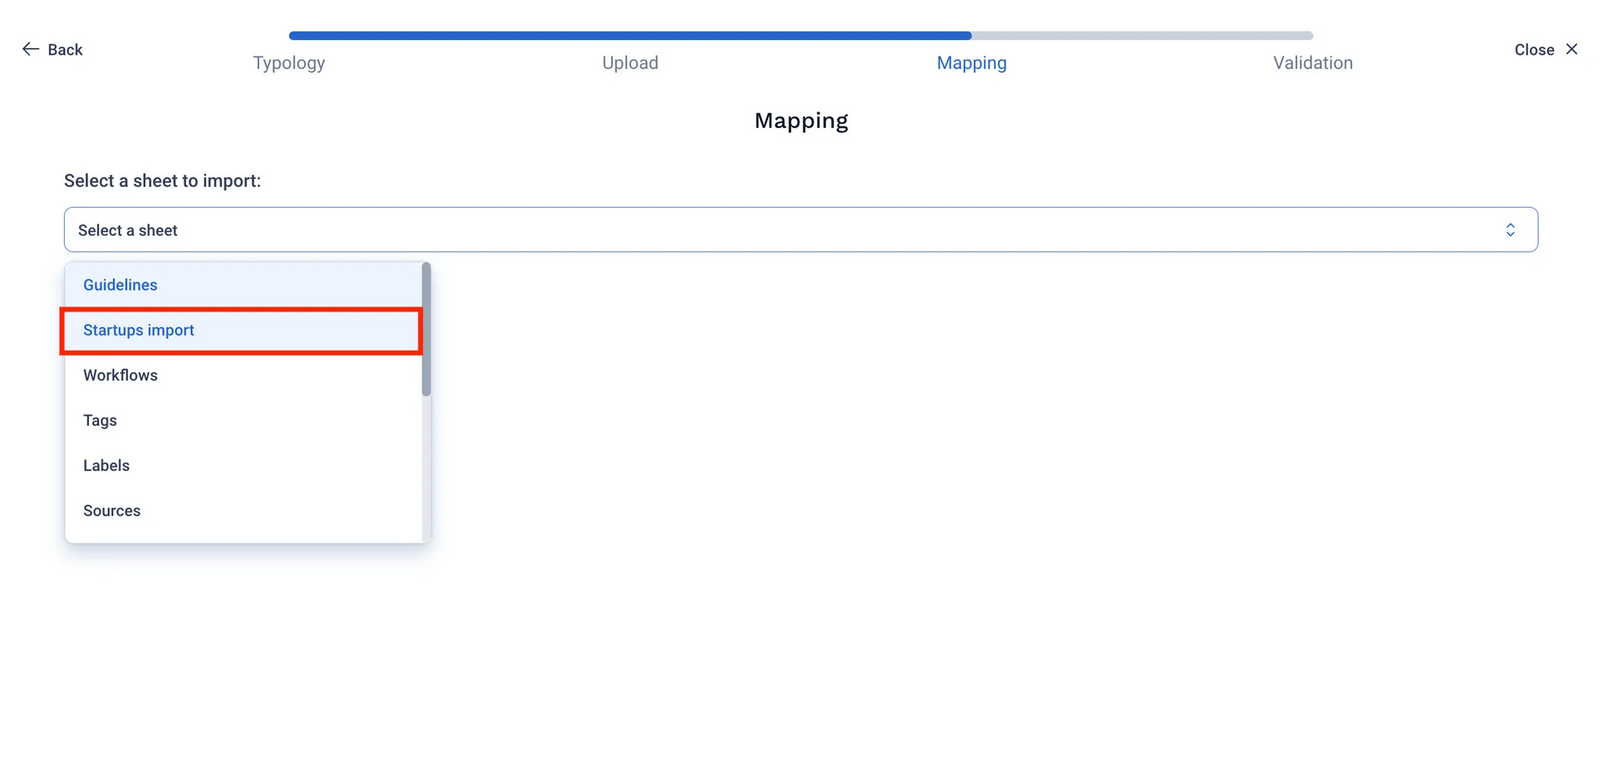
Review the automatically suggested mappings for * Column names * to * Bloomflow fields *. Adjust as needed or choose “Ignore for this import” for fields you don’t want to include.
- Enable Enrichment (Optional):
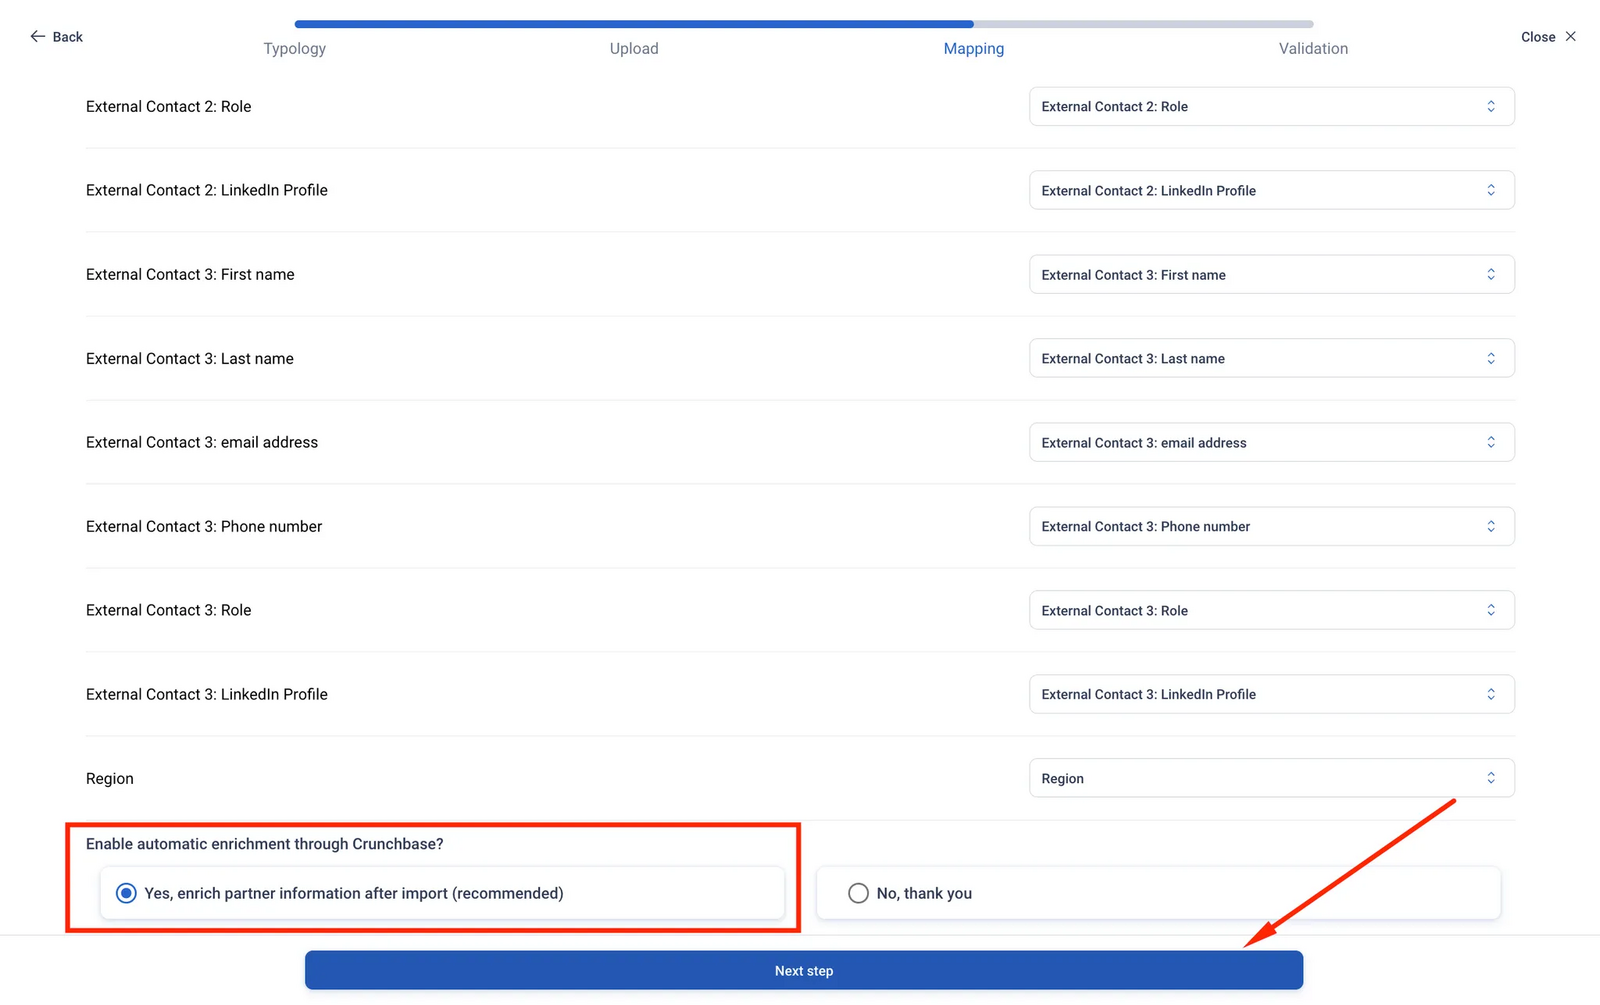
For partner imports, map the Website field and enable automatic enrichment via Crunchbase, if applicable.
- Validate Data:
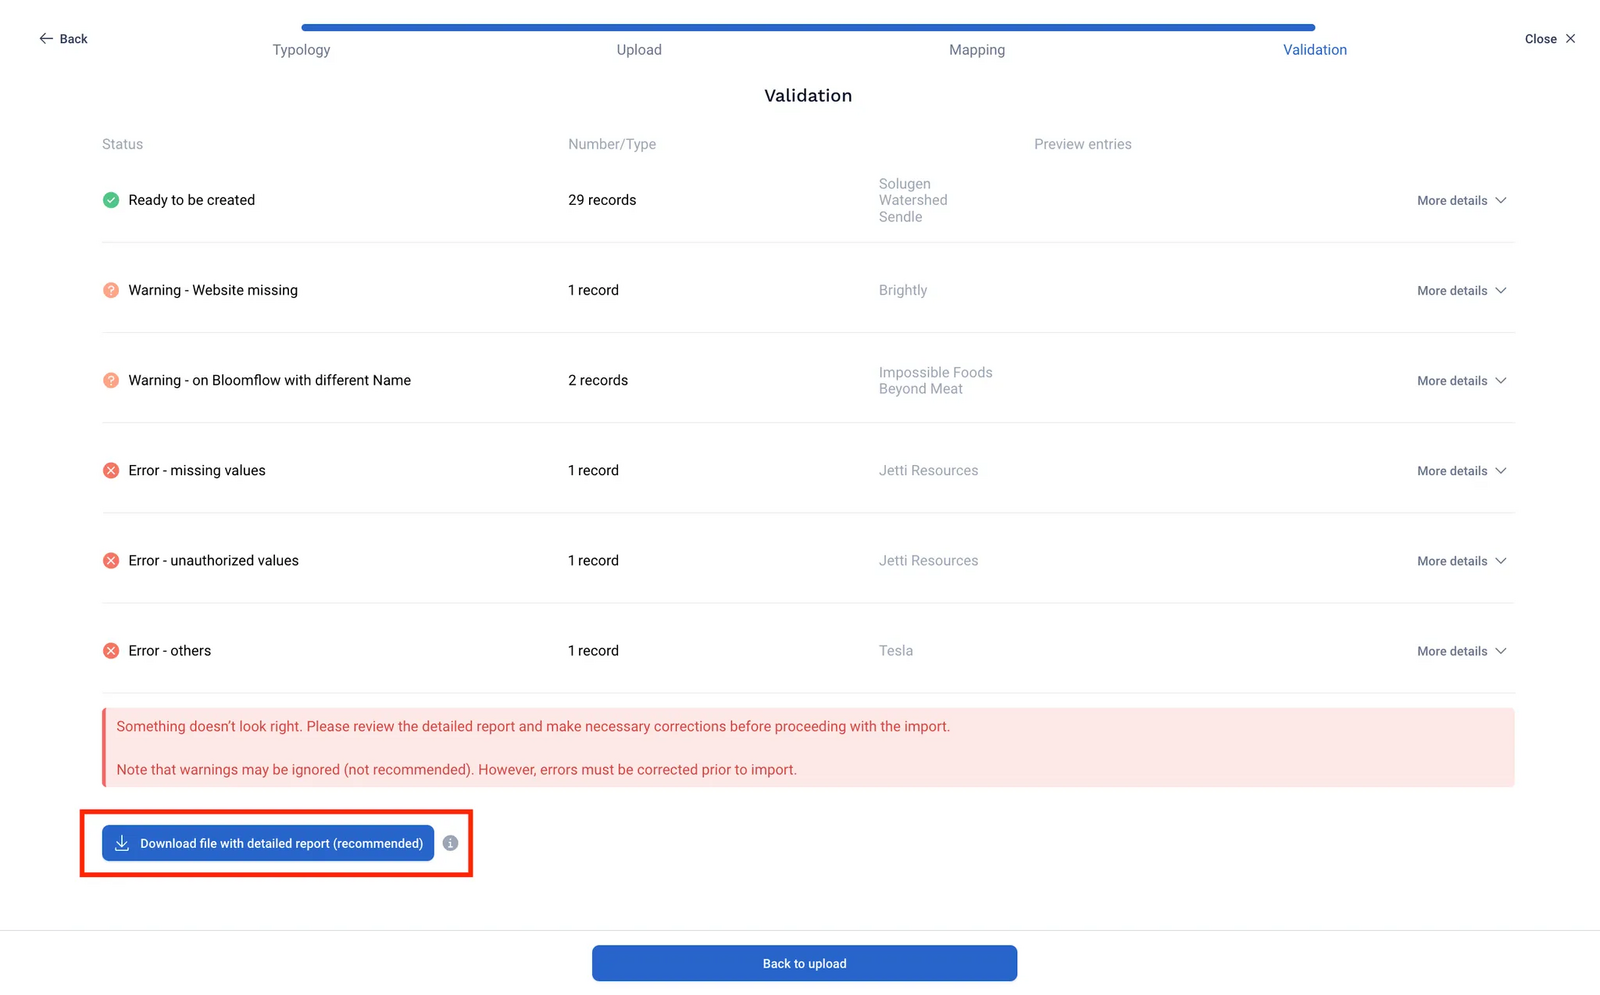
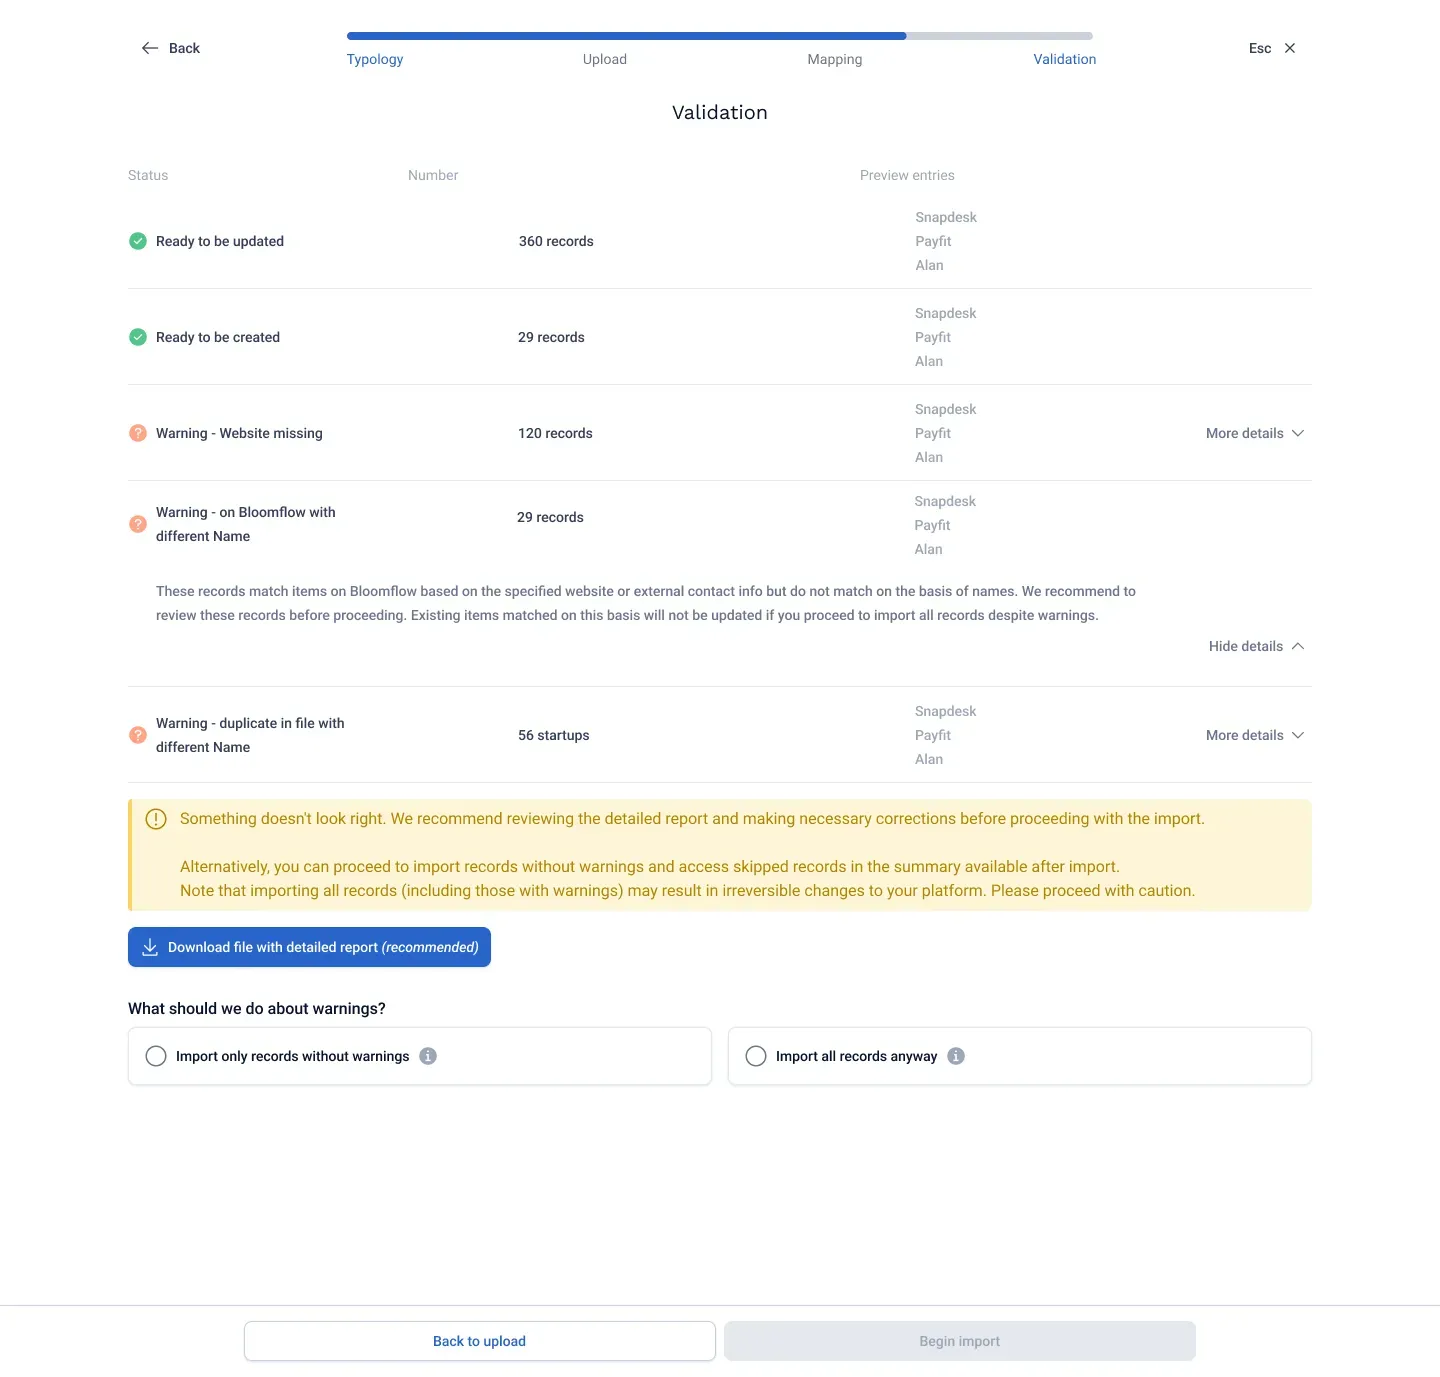
Review the validation summary for any warnings or errors. While warnings can be bypassed (choose to Import only records without warnings OR Import all records anyway), errors must be resolved before proceeding.
Download the Validation Report to address issues, click on Back to upload to re-upload the corrected file, if necessary.
- Complete the Import:
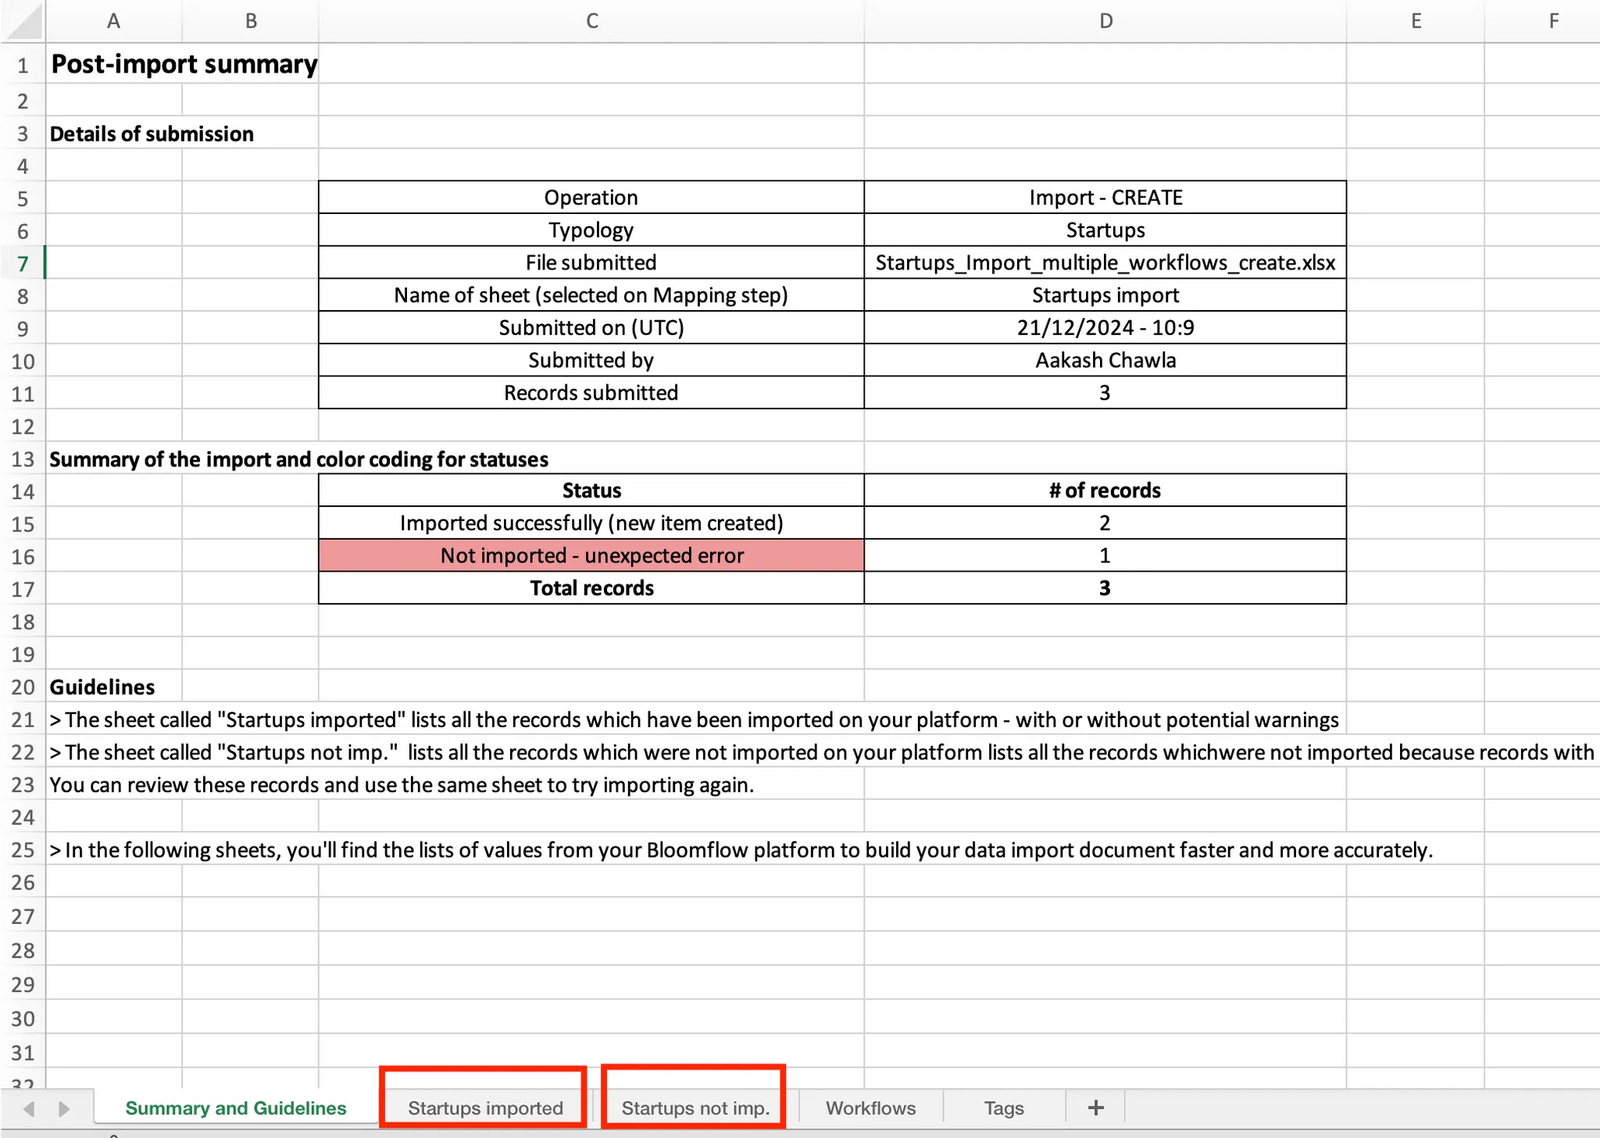
Once all records are validated, click Begin import. Track progress in Import History, and after completion, review the * Post-import summary * for details, including any items not imported.
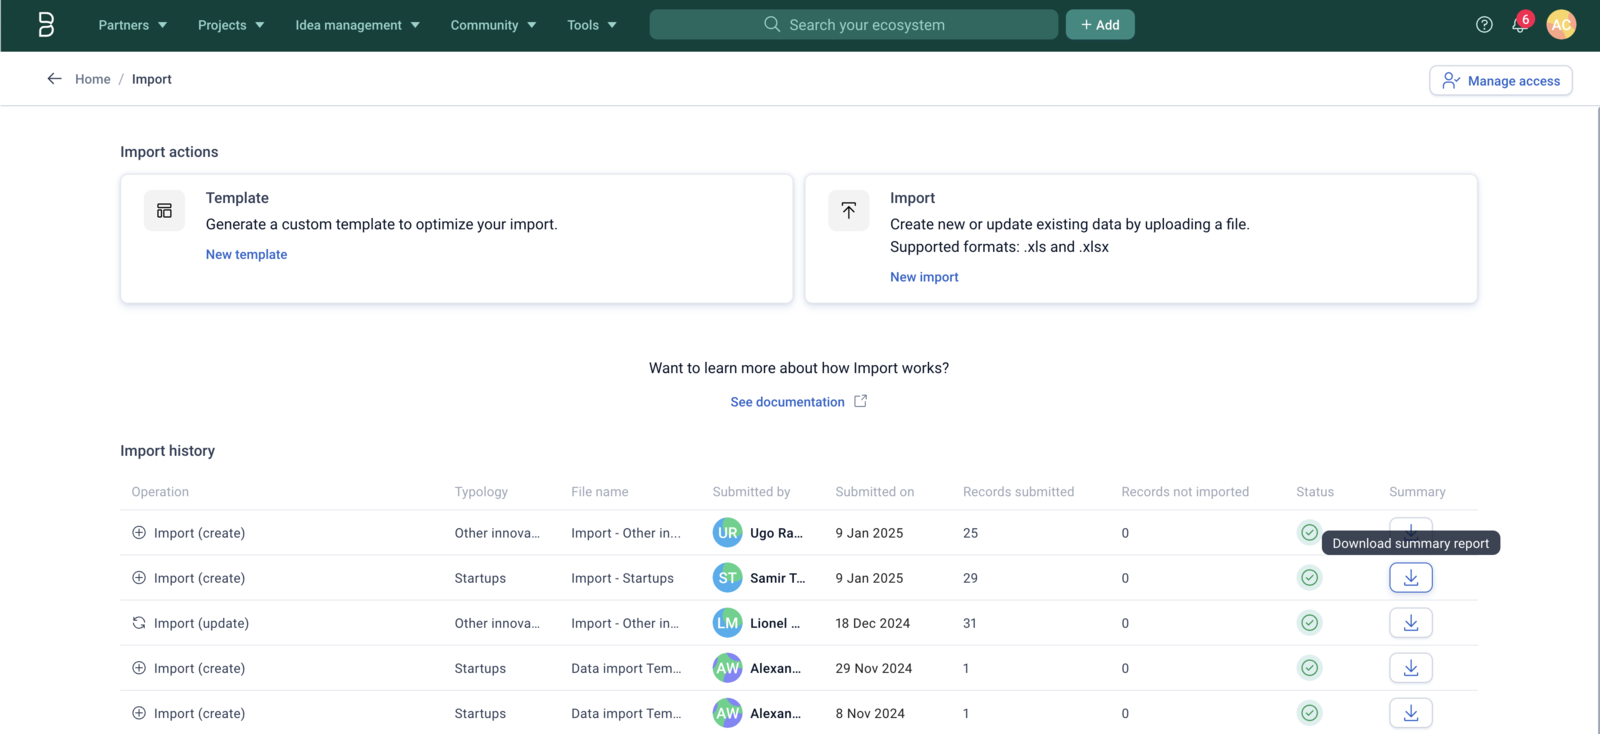
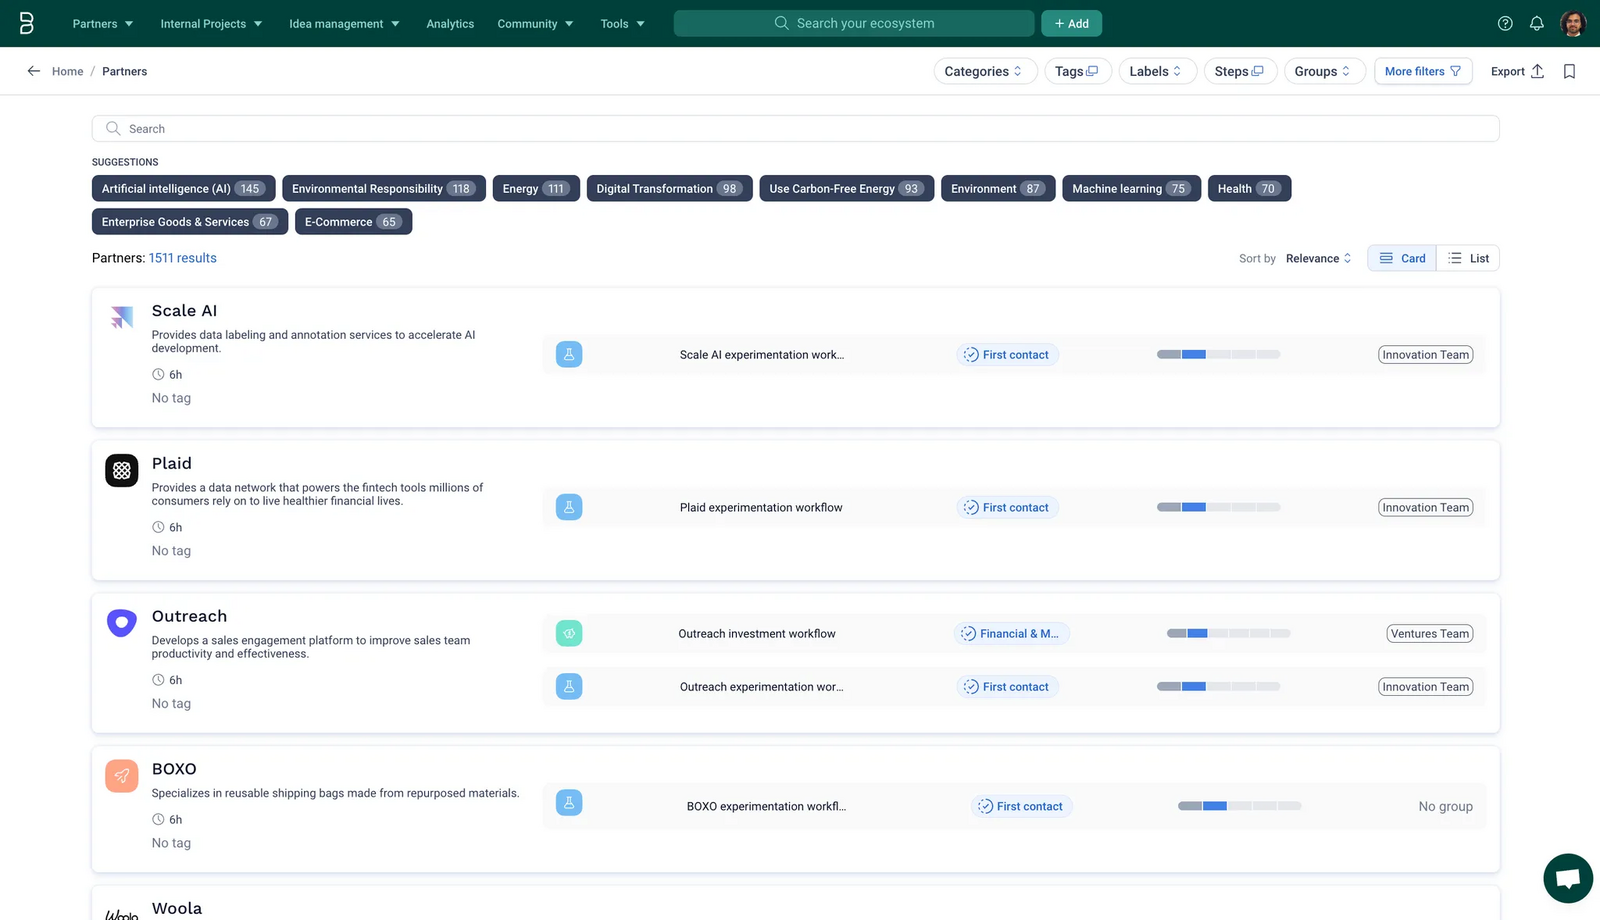
In case any items are not imported, find them in the Not imported sheet in the Post-import summary excel file.
- Handle any issues:
- If some items were not imported, find them in the "Not imported" sheet of the Post-import summary file.
- Correct the data in same Excel file and re-upload it if necessary.
3. Glossary of Key Concepts
- Import center
Centralized interface within the Bloomflow (Tools menu (Navbar) > Import) platform where you can manage imports. You'll find here:
- Import actions: Generate a custom template or begin an import using an Excel file.
- Import history: Review past imports by you or other team members.
2. Template
A customizable Excel file tailored to specific typologies (partners/projects) and corresponding Bloomflow fields. Further, it provides you guidelines and additional details to prepare data for import. Learn more about templates in Work with Templates section.
Note: While recommended, the import file does not need to follow Bloomflow templates. Column names from a non-templatized excel file can be mapped to Blooomflow fields during the import.
3. Item
A partner or project in a Bloomflow portfolio.
4. Record
A single row in an Excel file representing an item to be created or updated in Bloomflow.
5. Typology
A portfolio in Bloomflow, which can consist of either Partners (external entities) or Projects (internal entities, including Challenges if activated). Each import is specific to a selected typology.
6. Import operations
Choose between:
Create new: For adding only new items. Imports are blocked if item names match existing ones. Mandatory fields for new items must be included. Appears as Import (create) in Import history.
Update existing: For updating existing items or combining updates with new item creation. Only the item name is mandatory for updates. Appears as Import (update) in Import history.
7. File upload
Upload a .xls or .xlsx spreadsheet using either Bloomflow’s template or a custom format. Drag/drop or browse to upload. Sheets with no data or empty Column names cannot be used.
8. Mapping
In this step, you choose the relevant Excel sheet and map its Column names to Bloomflow fields. You review and adjust automatic mappings as needed. Remember, mandatory fields must be mapped to proceed. For Partner imports, you have the option to enable automatic enrichment via Crunchbase for all items.
9. Bloomflow fields
Data fields configured for portfolio items in Bloomflow. This includes default fields (such as Name, Website, Workflow Info, Tags, Labels, etc.) and custom fields (such as Project Budgets, Associated Business Units, etc.). Name is a mandatory field for all imports as it acts as a unique identifier. Learn more about Bloomflow fields in Navigate Bloomflow Fields section.
10. Column names
The names of columns in the first row of the Excel file being imported. When you set up your import, Exact matches with Bloomflow fields are mapped automatically on the Mapping step.
11. Validations & Validations report
Validation is the last step to check data integrity and compliance before import.
Validation summary: Overview of warnings and errors provided on Bloomflow. if there are any Warnings/Errors.
You will need to correct errors before proceeding.
For warnings, you can choose to Import only records without warnings (find skipped records later in Post-import summary) OR Import all records anyways.
Validation report: Detailed Excel report highlighting records with issues. It includes:
Summary and Guidelines: Explanation of sheets, validation summary, and color coding.
Detailed Validation Report: Color-coded records with Bloomflow validation statuses and comments, and specific cell issues with comments.
Validation Failures: Quick summary of mismatched values for quick review and corrections.
Appendices: Pre-defined values for fields.
Learn more about Validations, Warnings and Errors in the Understand Validation Report section.
12. Post-import Summary
An Excel report available in Import history that details the status of each record after an the import. It highlights imported records, skipped ones, and those imported with potential warnings.
4. Additional Links
Comments
0 comments
Please sign in to leave a comment.